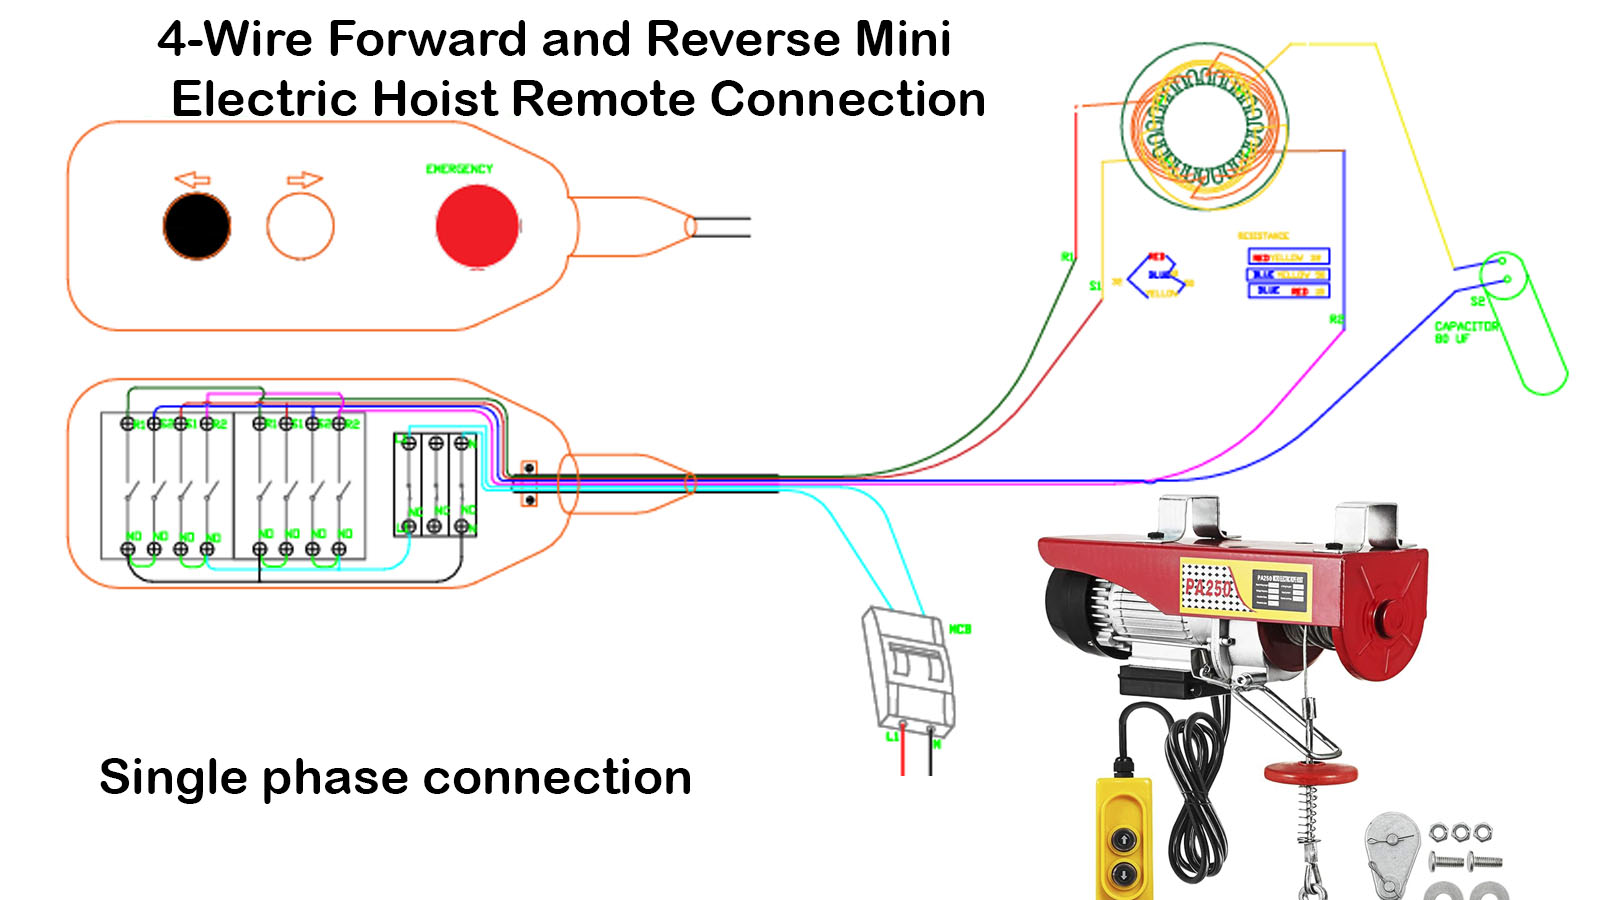
In this guide, we will explore the wiring setup for a 4-wire mini hoist winch, which operates on a single-phase connection. The motor has four wires: two running wires (R1 and R2) and two starting wires (S1 and S2). Let’s break down the steps for connecting these wires to the remote control system, which will enable forward and reverse (up/down) operation.
Motor Wiring
The motor’s wiring consists of the following:
- Running Wires: R1 and R2
- Starting Wires: S1 and S2
First, connect one of the starting wires (S1 or S2) to a capacitor. Then, bring all four wires (R1, R2, S1, and S2) to the remote control. These wires will be connected in a manner similar to a cam switch connection to achieve forward and reverse functionality.
Remote Control Wiring
The remote control has three main buttons:
- Up Button
- Down Button
- Emergency Stop Button (Normally Closed, NC)
Emergency Stop Connection:
- Connect the main power supply to the emergency stop button.
- The emergency button should be normally closed (NC), meaning that pressing it will open the circuit, stopping the hoist immediately.
Push Button Configuration:
Each push button in the remote has four terminals:
- Two terminals for phase connection.
- Two terminals for neutral connection.
- Up Button:
- For the up function, connect R1 and R2 (running wires) to the two side terminals of the push button.
- Connect S1 and S2 (starting wires) to the center terminals of the push button.
- Down Button:
- Similar to the up button, connect the remaining R1 and R2 wires to the side terminals of the down button.
- Swap the starting wire connections (S2 and S1) at the center terminals of the down button to reverse the motor’s direction.
Power Supply Connection
Finally, connect the power supply to the remote control:
- Two single-phase power wires are connected to the emergency stop button.
- The power will then flow through the NO (normally open) push buttons.
The push buttons are configured in such a way that pressing the up button energizes the motor to move upwards, and pressing the down button reverses the motor’s direction, lowering the hoist. The change in position is controlled by swapping the starting wires (S1 and S2) in the center of the push buttons.
Operation
- When the up button is pressed, the motor will turn in one direction (forward or up).
- When the down button is pressed, the motor will turn in the opposite direction (reverse or down).
This setup allows you to achieve a forward and reverse movement in the mini electric hoist.
Practical Implementation
For a better understanding, practical video tutorials are available on the Watt Vission YouTube channel. You can follow along for step-by-step guidance on this connection.
Brought to you by Nazakat Ali – Watt Vission
Your trusted source for electrical tutorials and practical solutions.
