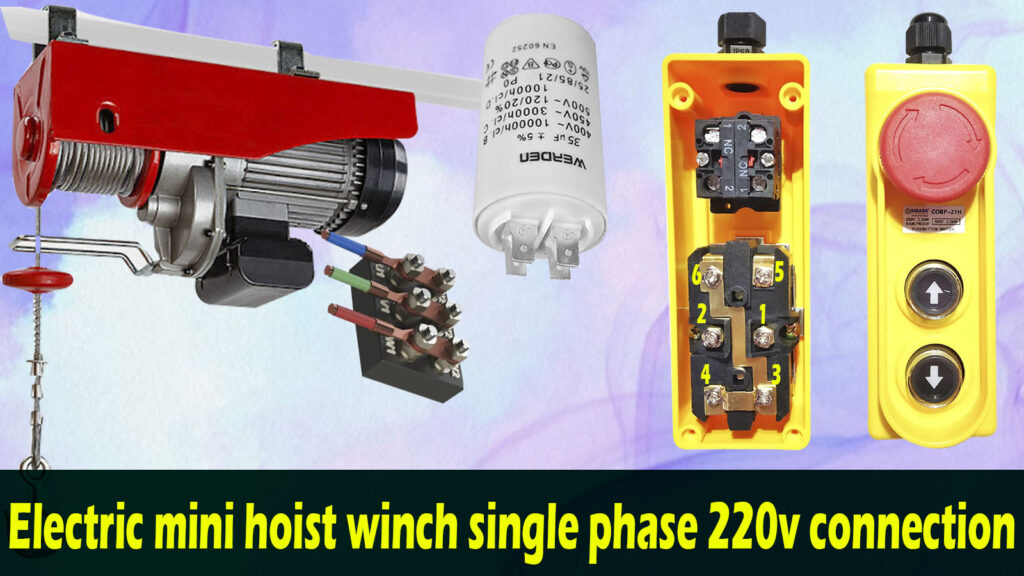
🔹 Mini Electric Hoist 220V Single Phase Wiring (Push Button Control)
🛠️ Components Used:
✔ MCB (Miniature Circuit Breaker)
✔ Push Button Remote (UP/DOWN + Emergency Stop)
✔ Capacitor
✔ Single Phase Motor (3-Terminal: Neutral + Two Running Wires)
🔹 Wiring Connections (Step-by-Step):
1️⃣ MCB Wiring:
- Phase from MCB Output → Connected to Remote NC Emergency Terminal
- Neutral from MCB Output → Connected to Motor Center Terminal
2️⃣ Emergency Stop (NC) Wiring:
- NC Output Terminal → Connected to Remote Center Terminal (1, Phase line)
- NC Output Terminal → Connected to Remote Center Terminal (2, Capacitor)
3️⃣ Motor Wiring:
- Motor Center Terminal = Neutral
- One Running Wire → Connected to Remote “UP” Terminal (5)
- Second Running Wire → Connected to Remote “UP” Terminal (6)
- Capacitor one wire is Connected one running wire(5)
4️⃣ Push Button Functioning:
- Press UP Button → (1,5) & (2,6) Continuity Get Power → Motor Runs UP
- Press DOWN Button → (1,3) & (2,4) Continuity Get Power → Motor Runs DOWN
5️⃣ Continuity Check And How Work
- UP Button Pressed: → 1-5 separate & 2-6 separate Connected
- DOWN Button Pressed: → 1-3 separate & 2-4 separate Connected
6️⃣ Copper Terminal Link:
- 3, 4 & 6 are Linked Together using a Copper Terminal Link
🔹 Final Wiring Summary (Number-wise):
- 1 = Phase Line (From MCB via NC Emergency Terminal)
- 2 = Capacitor Connection
- 5 & 6 = Running Wires (UP Function)
- 3 & 4 = Empty Terminals (Linked with 6 using Copper Terminal)
- Neutral = Direct to Motor Center Terminal
